3D Spiderman Cake Tutorial
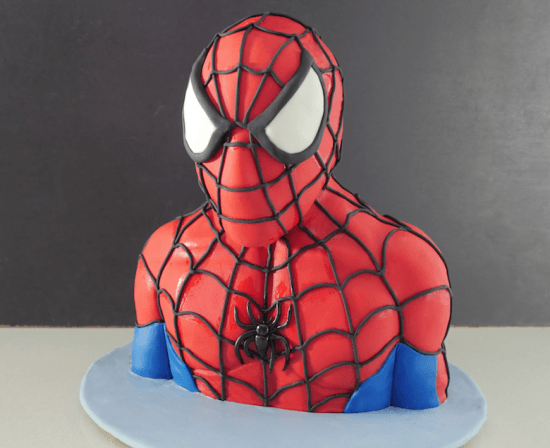
Spiderman, Spiderman, does whatever a spider can. Okay, but can a spider make kids squeal with delight? Can a spider be sliced up and eaten and leave people asking for more? Well, this Spiderman cake can!
This week I had the privilege of going to the YouTube Creator Summit in New York. Yes, Pewdiepie and Superwoman were there, along with about 150 other top YouTubers but the person I was the most excited to meet was JOHN GREEN. An old-school YouTuber, he also wrote the very popular novel and now movie, The Fault In Our Stars (see the cake here). So as you can imagine I was OVER THE MOON when John asked for a copy of our book The Deep Enders and said he was looking forward to reading it! That in itself made the 24 hours of travel from Australia to NY totally worthwhile.
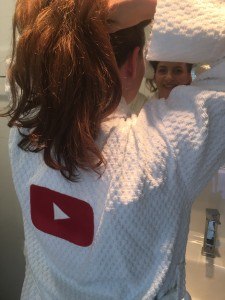
Big thanks to YouTube for thoroughly spoiling us with gifts on arrival and each morning, I love my new bathrobe with the embroidered YouTube play-button!
To make this spiderman cake you will need:
Spiderman cake template

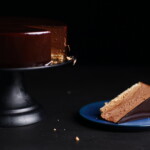
Cake
One and half times my Rich Chocolate Cake Recipe baked in two trays. My trays are 38.1cm (15 inches) x 25.4cm (10 inches).
Frosting
A double quantity of my chocolate buttercream recipe.
Simple Syrup
1/4 cup or 54g (1.9 ounces) sugar
1/4 cup 63millilitres (2.13 fluid ounces) water
Heat until the sugar is dissolved and allow to cool. Flavor with vanilla if desired.
Rice crispy treats
200g (7.05 ounces) or 2 ¼ cups Marshmallows
200g (7.05 ounces) or 6 ¼ cups rice bubbles
Fondant
750g (26.46 ounces) Red fondant
100g (3.53 ounces) Black fondant
100g (3.53 ounces) Bright blue fondant
250g (8.82 ounces) Pale blue fondant (optional for covering the board)
Other stuff
13in (33.02 centimetres) Round Cake board
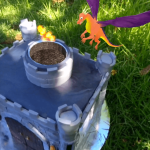
Centre cake support
fondant extruder (optional but makes the job easier I have this one)
Day 1.
Bake your cakes, allow them to cool. Wrap in plastic wrap so they stay fresh. Mix up a double batch of frosting. Make the simple syrup and leave to cool.
Make the rice crispy treat and follow the directions in the video to make the shape of spiderman’s head.
Day 2.
Cut out the template and use it as a guide to cut out the layers of cake.
Spread some frosting on the base board to stop the cake slipping and add the first layer. Spread that layer with some simple syrup to keep the cake moist and then another layer of frosting. Then continue in this way all the way up to layer seven.
Carve the cake as shown in the video and then cover the whole thing in frosting following the shape of the cake. Place it in the fridge for at least 30 minutes for the frosting to chill.
Cover the head in a thin layer of buttercream and add it to the top of the cake. Then use some frosting to smooth the join at the neck.
Make a long raindrop of red fondant and add it to the front of his face. Flatten it to make his nose and chin.
Add a short snake of red going across where his clavicle bone would be then wrapping it up and around where the neck muscle is.
The roll out a large sheet of red fondant and use it completely cover spidermans face and body using your hands to lift and smooth it around his shape.
Then trim off the exces around the base and make it neat.
Using a fondant extruder make a long skinny snake of black and use it to make the spider web pattern over his face and body.
Use the template to make the spider and place that in the freezer for 10 minutes to make it easier to transfer. To make the eyes cut around the template in white fondant. Add a little water around the edge then add a strip of black all the way around the outside of the eye.
Then using a little water add the eye into place on spider mans face.
On the base of this arm add the strip of blue and trim it off. Take the spider out of the freezer, peel off the baking paper and add it to the centre of spider mans chest.
Using the colour of your choice cover the cake board in fondant.
Remember to take a photo of your birthday child with the cake before the party starts, it’s very hard to get a good shot once all the kids are crowding around the cake.
Make it a great week!
My Cookbook

Stores that sell my book listed by country:
http://bit.ly/ARcookbook
All recipe quantities in the book are in grams, ounces and cups.


Do you have a picture of what the back of the cake should look like?
Hi! I cant finde the templets ?
I’m unable to find the template.. could u please send it to my email
I’m having trouble finding the cake support with the structure in the center, how did u make it
How tall of a center cake support do I need? Is 12 inch long enough?
Hi Ann, I hope you are well,
I was planning to make this beautiful Spiderman but I was thinking to bake the red velvet cake instead of the chocolate one.. Do you think it’s possible?
I wanted to use your receipe and your frosting one as well, will it make the same as the chocolate one to put around the cake before putting the fondant?
Thank you for your help, your work is amazing! X
Is the template printable once you purchase it? Or does it have to be mailed? We have to make a cake this friday and want to make this one.
Hi Deric, you’ll be sent a digital link to download and print at home 🙂
Hi Ann
Could you please confirm how deep your cake trays are. I live in NZ and the trays closest to your size are more like cookie trays. 2.5cm x 24cm x 33cm would that work for your recipe?
Thanks heaps look forward to your reply.
Please can i have the link for templates please
Thank you for this wonderful tutorial! I made it for my son’s 6th birthday and he loved it. It did take me a looong time though and I really struggled with the fondant so I ended up cutting it into sections-first his torso then did the head separately and then tried to smooth it into each other. The web part is what I found was the most time consuming, especially trying to make it stick. It was definitely worth the effort!
Thank you! This was perfect!
Hi Ann!
Thank you so much for this video. I made the cake for my son’s 6th birthday two days ago! It was a hit. Thanks again!
Lina
Great job Lina, looks amazing, happy birthday to your son ?
Hi I just purchased the Spider-Man cake template (under my husbands email: [email protected]). I have 2 questions:
(1) what did you use as/for the cake support?
(2) Can you the Wilton brand that doesn’t go through the cake board, as the support?
Thanks
Hi Lina, Because of the weight fo the head you will need a support that goes through the board. I don’t think this support is available anymore. You can use a threaded rod and hex nuts as shown in this video… https://wellness-wave1.news/public_html/gravity-defying-cake/%3C/a%3E%3C/p%3E
Hey Ann,
Such an amazing tutorial!!
I’m going to attempt to make it.
I had a couple of questions.
1) What should the height of the center cake support be?( As in I don’t want it to accidentally poke out of Spider man’s head!)
2) And what will be the total height of the cake be after decoration?
Hi Nirali, Please see the template for measurements
Hi Ann, such an amazing cake!! I am attempting this spiderman cake for my son’s birthday this weekend, and unfortunately my tins were a bit shorter than yours (all I could find), so I’ve had to print the templates smaller. Do I still have to use a support rod in the center of the cake, as it will be shorter than yours (I still have a support for the head, but even the length of that could prove too long!)? Also my cake is quite dense (the chocolate cake recipe provided). Is it supposed to be like this? Or have I done something wrong? Many thanks!
Hi Carissa, the chocolate cake is reasonably dense for carving but it is not a heavy mud cake type density. If in doubt always add support. It is better to have it and not need it than to leave it out and it fall apart after all your decorating work. Generally though I don’t go more than 3 tray layers tall without a support.
I just made this and thought a few extra tips might help!
I struggled with getting the layers lined up. I would next time build them without butter cream and put a rod through so when it comes to building the layers properly with butter cream the holes are already made.
I also struggled with the head. I ended up using a dowel cap and a skewer either side to support the weight better. I also added extra dowels to the body via the shoulders.
I couldn’t do the fondant in one piece so I did front, wrapped it around, head and then the back. It worked perfectly.
Hope this helps!
Looks great Lucy, I love your tip of putting the hole through before adding buttercream so you know where to put the layers on top. ?
Hi where can I get the template for the 3d spiderman cake pls want to make it for my son’s birthday.
Hi Doreen, just below where it says things you will need to make this cake, there is a link to purchase the template. ?
Hi! How thick is each layer? I’m struggling to find a good 10×15 inch pan so may make deeper cakes and slice horizontally. Also – the link to the extruder doesn’t appear to be working. Thanks – I plan on making this for my son’s 5th birthday, he is so excited!
Hi Lucy each layer of cake is about 2.2cm thick. Baking in a big tin will be tricky to get a moist cake that isn’t overcooked on the edges. Thanks for letting me know bout the extruder link, I’ll check it now – hmmm seems to be working for me.
Do you have a tutorial for superman that I can purchase?
Thank you so much.
Kathy Jo
Hi Kathy, sorry I don’t have a superman one yet.
Hi may i ask if where can i copy a template of 3d spiderman cake step by step ? Can i ask for a copy of template?Thankyou
Hi Jazel, There is a link above in the post to get template, listed under things you will need.
How many serving will the Spider-Man cake feed?
Hi Pungs, It depends on how big you cut the slices but around 25 – 30 people
Love this tutorial, thank you for sharing. Approximately how many servings does this cake make?